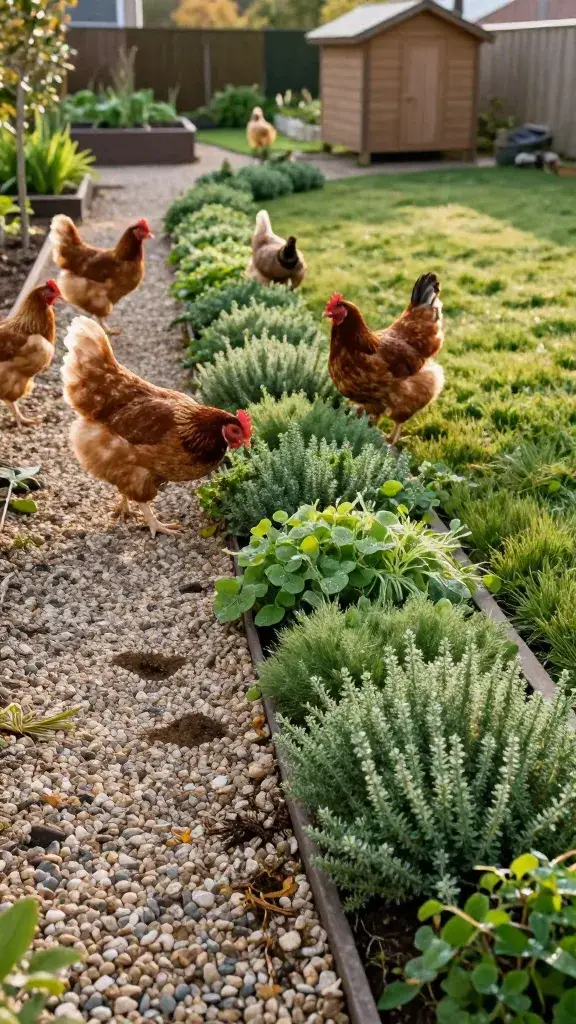
Diy Walkway Edging Ideas That Survive Chickens (and Don’T Become a Trip Hazard) That Actually Work
Chickens are adorable little rototillers with feathers. They’ll scratch, fling mulch, and test every edge like it owes them money. If your walkway looks like a crime scene after free-range hour, you need edging that stays put and won’t send you flying. These five DIY ideas look great, stand up to poultry chaos, and won’t become ankle breakers.
We’re talking low-profile, durable, and easy-to-install options you can tackle this weekend. Ready to outsmart your flock without ugly fencing? Let’s build edges that actually last.
1. Low-Profile Paver Soldier Course
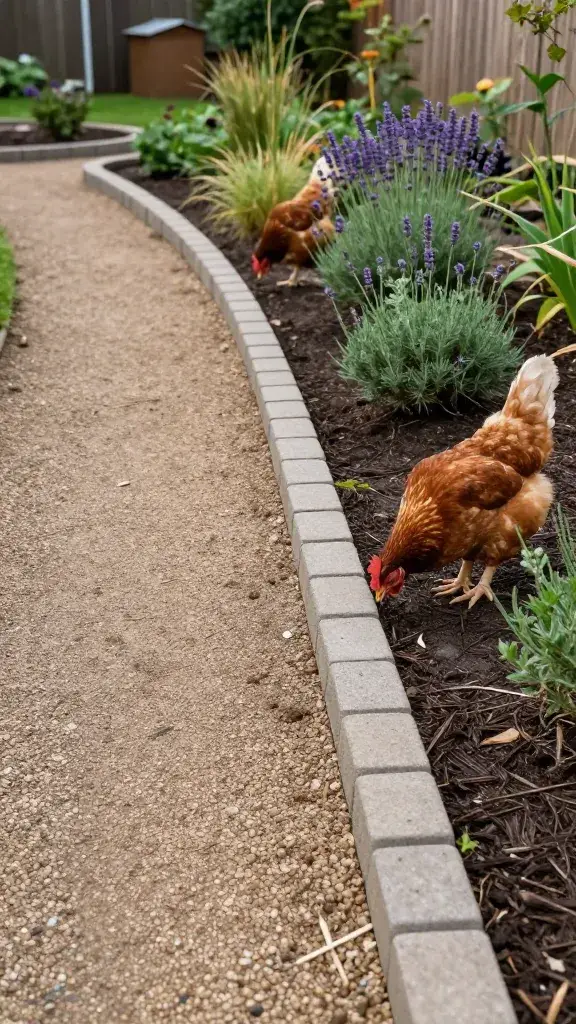
Set pavers on edge and lock them in—your hens can’t budge this. A “soldier course” creates a clean, polished line that sits nearly flush with the path, so no toe-stub moments. It also anchors mulch or gravel like a champ.
Why It Works
- Weight + depth keep pavers from tipping when chickens scratch nearby.
- Low reveal avoids trip hazards, even on narrow paths.
- Flexible layout handles curves and corners with a few cuts.
Materials
- Concrete or clay pavers (standard 4×8 works great)
- Paver base (crushed stone) and paver sand
- Edging spikes or landscape adhesive (optional for extra hold)
- Rubber mallet, level, string line, tamper
How-To
- Dig a trench along the walkway: about 6 inches deep and a hair wider than your paver thickness.
- Add 3–4 inches of compacted base, then 1 inch of sand. Level it.
- Set pavers vertically or slightly angled toward the path. Tap them in snug with a mallet.
- Backfill on both sides with compacted base to lock them in.
- Sweep in polymeric sand between pavers for extra stability.
Use this when: You want a classic, tidy look that resists scratching and handles heavy foot traffic.
2. Buried Steel or Aluminum Strip Edging
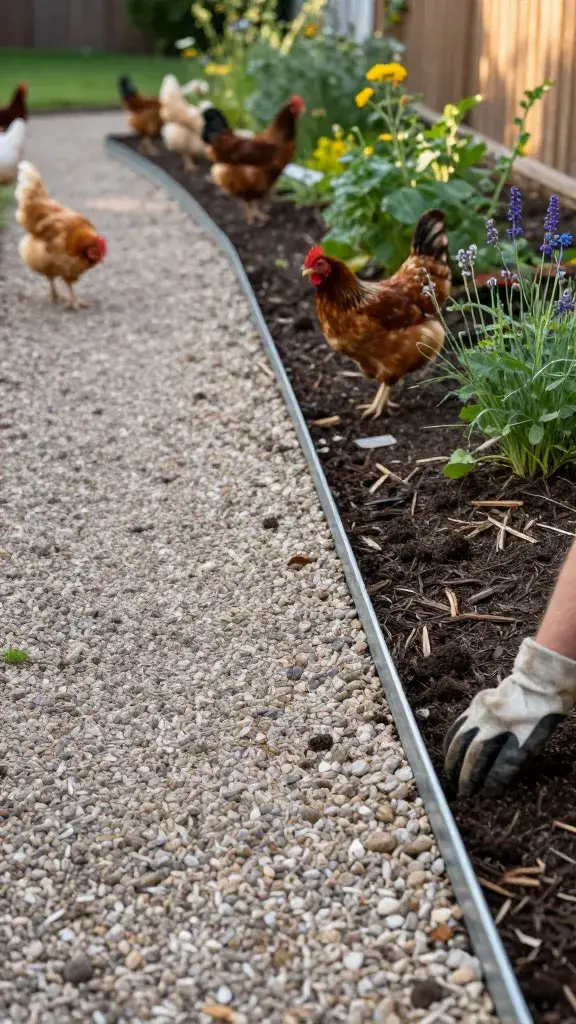
Want nearly invisible lines with maximum strength? Thin metal edging gives you crisp borders that don’t snag feet or tempt chickens to pull. It sits low, flexes for curves, and stays exactly where you put it.
Why It Works
- Minimal profile equals fewer trips and pecks.
- Anchoring stakes keep dogs, kids, and birds from shifting the edge.
- Crisp separation makes mulch or gravel look professionally installed.
Materials
- 1/8-inch steel or aluminum landscape edging (4-inch height is ideal)
- Stakes (usually included) and a dead-blow hammer
- Rust-inhibiting paint for steel (if not galvanized)
- Gloves, spade, and string line
How-To
- Mark your line and slice a narrow trench with a spade.
- Set edging so only 1/2 inch shows above grade, max.
- Drive stakes on the garden side every 2–3 feet and at joints.
- Backfill and tamp both sides to eliminate wiggle.
- Paint exposed steel edges to prevent rust if needed.
Use this when: You want sleek lines without visual bulk, and you don’t want to babysit your borders. FYI, aluminum won’t rust; steel is tougher but needs coating.
3. Concrete Ribbon With Gravel Shoulder
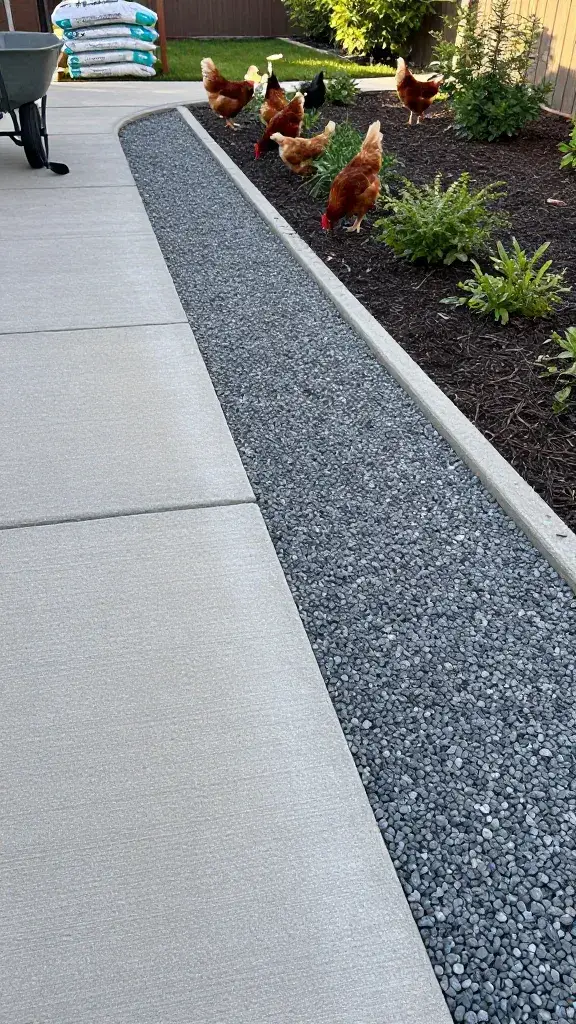
Pour a narrow concrete “ribbon” along the path edge for a rock-solid boundary. Then fill the outside shoulder with compacted gravel so it drains, looks finished, and stays chicken-proof. The top stays flush with the path—no toe catchers here.
Why It Works
- Monolithic strength beats scratching, rain, and wheelbarrows.
- Flush finish means zero tripping and easy sweeping.
- Gravel shoulder gives birds nothing to fling back onto the walkway.
Materials
- Concrete mix (high-strength or fiber-reinforced)
- Form boards or reusable edging forms
- Rebar or wire mesh (optional but ideal for longer runs)
- Compacted base gravel and 3/8-inch decorative gravel
- Trowel, float, stakes, level
How-To
- Excavate a strip 6–8 inches wide and 4 inches deep along the path.
- Compact 2 inches of base. Set forms to finish level with the walkway surface.
- Place rebar/wire where needed, then pour and trowel smooth with a slight bevel.
- Cure properly (cover if hot or windy). Remove forms.
- Backfill the outer side with compacted decorative gravel.
Use this when: You want a permanent, low-maintenance edge that cleans up your path and laughs at chicken claws. IMO, it’s the best long-term fix for high-traffic spots.
4. Timber Edging You Can’t Trip Over (Half-Buried 4x4s)
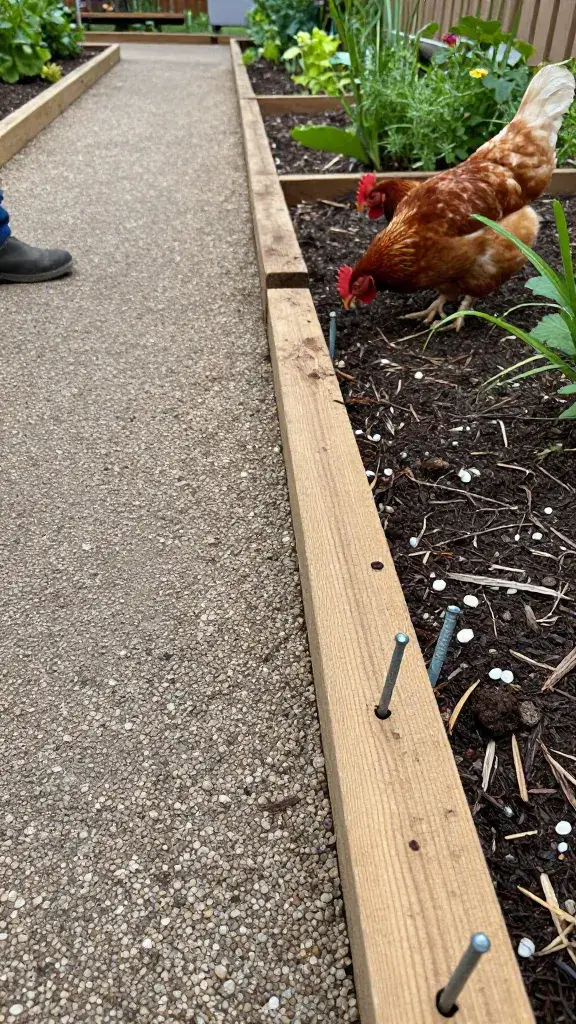
Wood edges look warm and rustic, but chunky timbers can trip you up. The hack? Bury half the height and pin them in place with rebar. Chickens can’t roll them, and you won’t kick them with a sleepy morning stride.
Why It Works
- Half-buried mass stays put against scratching and soil movement.
- Rebar pins act like anchors—no rolling, ever.
- Rounded top edges make it foot-friendly if you step close.
Materials
- Pressure-treated 4x4s or rot-resistant cedar
- Rebar (1/2-inch) cut into 18–24 inch lengths
- Drill with 5/8-inch bit, sledgehammer, handsaw
- Gravel for drainage and soil to backfill
How-To
- Dig a trench for the timber so only 1.5–2 inches sits above grade.
- Add an inch of gravel at the bottom for drainage.
- Drill through the timber every 3–4 feet and near ends.
- Drive rebar through and into soil until the top sits just below the wood surface.
- Backfill on both sides and tamp hard.
Pro tip: Round over exposed edges with a sander or router to reduce scuffs. Use this when: You want a natural look that still handles birds and carts without drama.
5. Living Edges: Tough Groundcovers As Natural Borders
Who says edging needs to be hardscape? Dense, mat-forming groundcovers create a flexible “soft curb” that keeps gravel in and deters scratching—because roots hold soil like a net. Choose low, foot-friendly plants that shrug off the occasional chicken ambush.
Why It Works
- Root mats stabilize soil and keep mulch from migrating.
- Low profile equals no tripping and easy mowing or trimming.
- Self-healing fills gaps after bird activity or foot traffic.
Plant Picks (Chicken-Tolerant, Low-Growing)
- Woolly thyme (Thymus pseudolanuginosus): Aromatic, tight mat, purple blooms.
- Creeping Jenny (Lysimachia nummularia, non-variegated for toughness): Fast cover, bright chartreuse pop.
- Kurapia (Lippia nodiflora hybrid): Drought-tolerant, traffic-friendly, long bloom season.
- Dwarf mondo grass (Ophiopogon japonicus ‘Nana’): Clumping, tidy, shade tolerant.
How-To
- Prep a 6–12 inch band of loosened soil along the walkway edge.
- Amend with compost and a slow-release, organic fertilizer.
- Plant tight—6 to 8 inches on center—to close gaps fast.
- Mulch lightly with fine gravel to discourage initial scratching.
- Water consistently until established, then taper off.
Use this when: You want a softer look, better drainage, and bee-friendly blooms next to your path. Seriously, it’s gorgeous and low-risk for tripping.
Quick Safety and Success Tips
- Keep edges flush or under 1 inch tall near walking lanes to avoid trips.
- Compact everything—base, backfill, gravel. Chickens target loose material first.
- Mind drainage: Standing water invites pecking and undermines edges.
- Test with a shovel: If you can wiggle it easily, your hens definitely can.
- Mix strategies: Hard edge on the path side, living edge on the garden side = best of both worlds.
Which One Fits Your Yard?
- Modern vibe + curves: Aluminum/steel strip edging.
- Classic cottage path: Paver soldier course.
- Heavy-duty, set-and-forget: Concrete ribbon with gravel shoulder.
- Rustic charm: Half-buried 4×4 timbers.
- Soft, green border: Tough groundcovers.
Bottom line: you can have pretty paths and free-range birds without living in a construction zone. Pick the edge that matches your style, keep it flush, and lock it in tight. Your flock will test it—let them. You’ll win this round, and your walkway will finally stay photo-ready, FYI.
Share this content: